GPIOs #
Introduction #
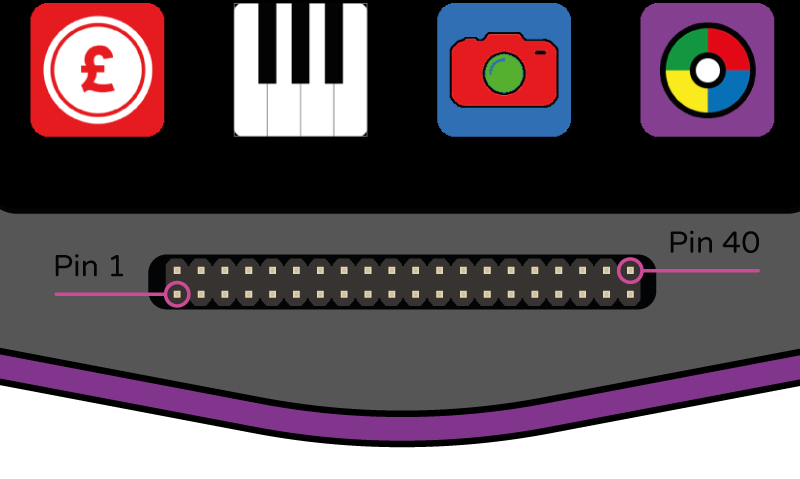
Pip’s 40 pin GPIO header allows a range of sensors, motors, LEDs and accessories to be connected to Pip.
It is Raspberry Pi Compatible, meaning that the majority of Raspberry Pi HATs can be connected to Pip.
What is a GPIO? #
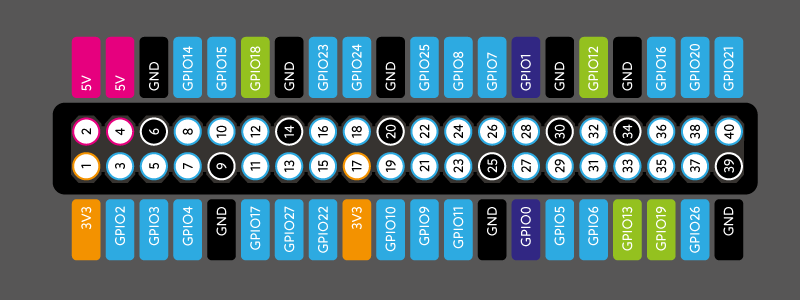
GPIO is short for General-Purpose Input/Output and these pins can be set to either input or output signals to control a range of electronic accessories.
The header provides pins that can be configured as inputs and outputs. By default they are all configured as inputs and can be controlled from programs you write in Python or other languages.
Do not connect wires and sensors to these pins without properly understanding how they work. A short circuit or wiring mistake can permanently damage the pins.
Flashing an LED #
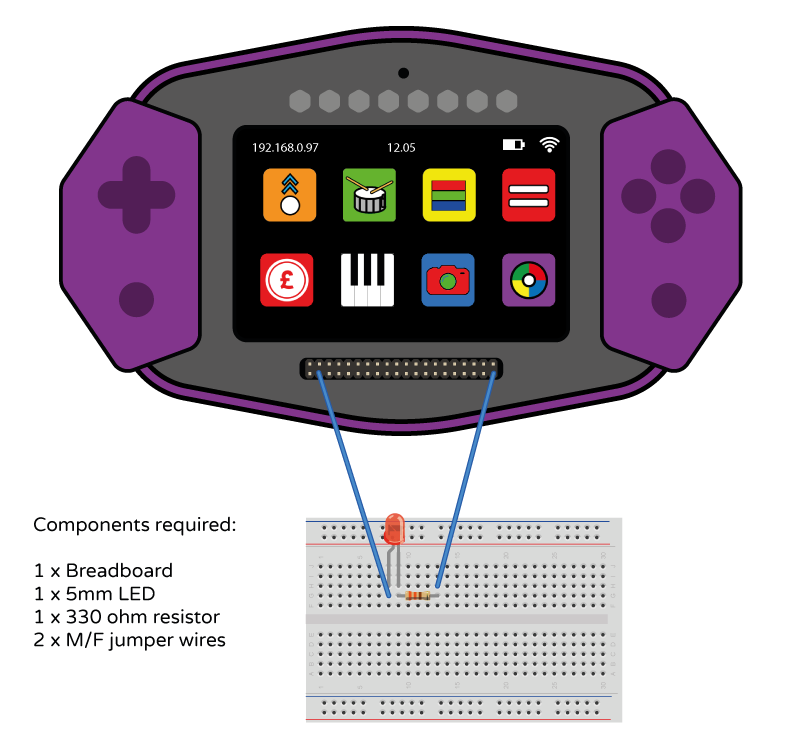
This short exmple will show you how to make an LED flash using Pip.
You wil need some basic components for this (outlined below). Wire up the circuit as shown in the image, connecting the long lead of the LED to GPIO 2 (Pin 3) and the resistor to GND (Pin 40)
Below is some example code that will flash the LED connected to GPIO 2. To run it, create a new project using
the “PHP Web App” template, paste this code into index.php, and run.
<html>
  <head>
    <script src='/pip/pipkit.js'></script>
    <script>
      const gpio = 2;
      var on = false;

      function init() {
        pip.gpio.setPinFunction(gpio, pip.PIN_FUNC_GPIO);
        pip.gpio.setPinMode(gpio, pip.PIN_MODE_OUTPUT);
        setInterval(function() {
      	  on = !on;
          pip.gpio.digitalWrite(gpio, on);
      	}, 1000);
      }
	</script>
  </head>
  <body onload='init()'>
     <h1>LED flash test</h1>
  </body>
</html>